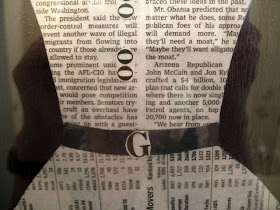
It's time again for a knock-off tutorial! This week, I'm hacking Ballard's Newspaper Dress ($299-ouch) and the Newspaper Shoe, Glove and Handbag Prints ($89 each). I've since seen a few tutorials for the dress (one used old dress patterns instead of newspaper and it's CUTE) but I've not seen an for the shoes, gloves and purse. WELL. I felt they were even more interesting than the dress, and I originally intended to omit the dress entirely.
Long story short, I hacked them all! And for the first time ever, I've made a printable PDF template. Wheee!
Tutorial after the jump.
First thing's first, you'll need some 20"x30" foam-core posterboard. I bought mine from Dollar Tree. They carry both black and white posterboard, but I though the black would have a better visual impact.
You'll also need a pretty good amount of newspaper. Our local newspaper isn't much more than a pamphlet, and it's about 85% color classified ads, so I bought a Wall Street Journal for this particular project. I needed a lot of actual newsprint (not just full-color ads for BBQ restaurants) and I also wanted a paper that would have a lot of large letter O's for the buckles and buttons on the shoes and handbag. Oh, and the dress bodice, too.
Keep everything in nice neat piles, or you'll spend 15 minutes trying to figure out which gloves your thumb cutouts belong to (Yes. 15 minutes. I'm dyslexic sometimes).
Cut out all the capital O's in the paper's headlines and set them aside for buckles and buttons. When you've got all your pieces cut out and sorted, begin layering them and deciding on their placement on your posterboard.
Next, break out the Mod Podge and starts slathering it on your posterboard. Place the bottom newspaper layer on the Podge and position it the way you want. Smooth out the wrinkles and spread some more Podge on. Place the next layer on it, and repeat until your layers are exactly right.
Go ahead and apply a layer of Mod Podge to the rest of the posterboard surface and let it dry overnight. There are a lot of layers, so you'll be glad you waited.
I added verbiage to mine, as I intended to hang it in the bathroom, but of course this is optional. Also optional is the newspaper matte I applied to the edges of the posterboard. Again, these are aesthetic choices you can use, change, or ignore entirely.
The overall dimensions are 20"x30", so they are pretty bold. If I'd had room, I'd have hung them side-by-side. As it is, I hung them on two different walls in the bathroom and they look great. I framed them in some old poster frames from Walmart (they cost $11.44 ea.) This project is a bit labor-intensive inasmuch as there's a lot of cutting to do, but the project requires only a Preschool skill level and the result is really stunning.
AND NOW FOR THE PRICE:
Newspaper: $2.50
Posterboard:$2.00 (for two)
Mod Podge: on hand
Total: $4.50
I will be happy to email you a PDF of the templates I made for the cutouts. You can always get hold of me at craftybutt@hotmail.com. If you make this or any project on Crafty Butt, please send me an email and a picture of your finished project and I'd love to feature you!
Happy Crafting!!


tHis is cute! Your projects always look proffessional even though their really inexpensive.
ReplyDeleteI'm so glad you're back!! Great project
ReplyDeletegreat job really cool
ReplyDeleteJust beautiful. I like yours even more than the original.
ReplyDeleteYou're too kind!
ReplyDeleteyou did SUCH a beautiful job! A seriously perfect knockoff! You could also stain the newspaper with tea or coffe if you want to browns or use some pattern paper (you can always pick up random sewing pattern paper at thrift stores!)
ReplyDeleteI'm visiting from Funky Polkadot Giraffe! I would love it if you checked out my blog plus I have a giveaway going on right now!
Kaitlin @ The Goodey Knot
Love the newsprint art! I saw these in their catalog and wanted to make them too!
ReplyDeleteCute, Cute, Cute!!
ReplyDeleteTot
This is cool, thanks for the lesson, Celeste,
ReplyDeletevictoriantailor.com
Soooo, I've just been to all your sites and holy frijole! So much beauty and creativity. And yeah, Kaitlin, don't think I won't jump on in on a giveaway!! CUZ I WILL.
ReplyDeleteThis is great! I love your blog title. It totally made me giggle!
ReplyDeleteCute hacks, Melody! And thanks for the terrific tutorial.
ReplyDeleteI'm glad you joined the party. I'd love to have you link up each week. Be sure to stop by and see yourself featured tonight.
Liz @ the Brambleberry Cottage
http://thebrambleberrycottage.blogspot.com/
WOW....I am impressed..... Knew you were talented...but uhmmmm sheeeesh... NICE JOB!!!!!!!!!!~!~!
ReplyDeleteI'm new to your site but will be with you from now on, because you are one CRAFTY BUTT! I agree with everyone else. I saw these prints for the $$$ price and almost choked. Thank you so much for sharing( big hug for you and a big smile too)Lady "YOU ROCK!"
ReplyDeleteHow fun!! I'd love for you to link up!!
ReplyDeletehttp://polkadotsonparade.blogspot.com/2011/05/wow-me-wednesday-11.html
Just found your blog - the name is a grabber. (okay, crafty butt and grabber might be a bad image!) Am an author with stacks of old books in the basement and can totally see doing a collection of this art with pages of those books. Your 'copy' is perfection! Come by and share your link at DearHelenHartman.bloggspot.com
ReplyDeleteLove these. Have had the Ballard prints bookmarked as a to-do project. This will move it up the list!
ReplyDeleteJust darling, you did a great job, can't imagine those prices! thanks for linking up with VIF!
ReplyDeletexo Debra
Love it, amazing job, I want to make the dress
ReplyDeleteLove it
ReplyDelete